Unboxing Georgi
Congrats on the purchase of your Georgi! Let’s get the little guy all set up.
In your package you should have a little note from me, the two halves of Georgi and any cables you may have ordered. If you didn’t order cables from me, you will need a MiniUSB and a TRRS cable (looks like a headphone connector, but has 4 gold bands instead of 3!).
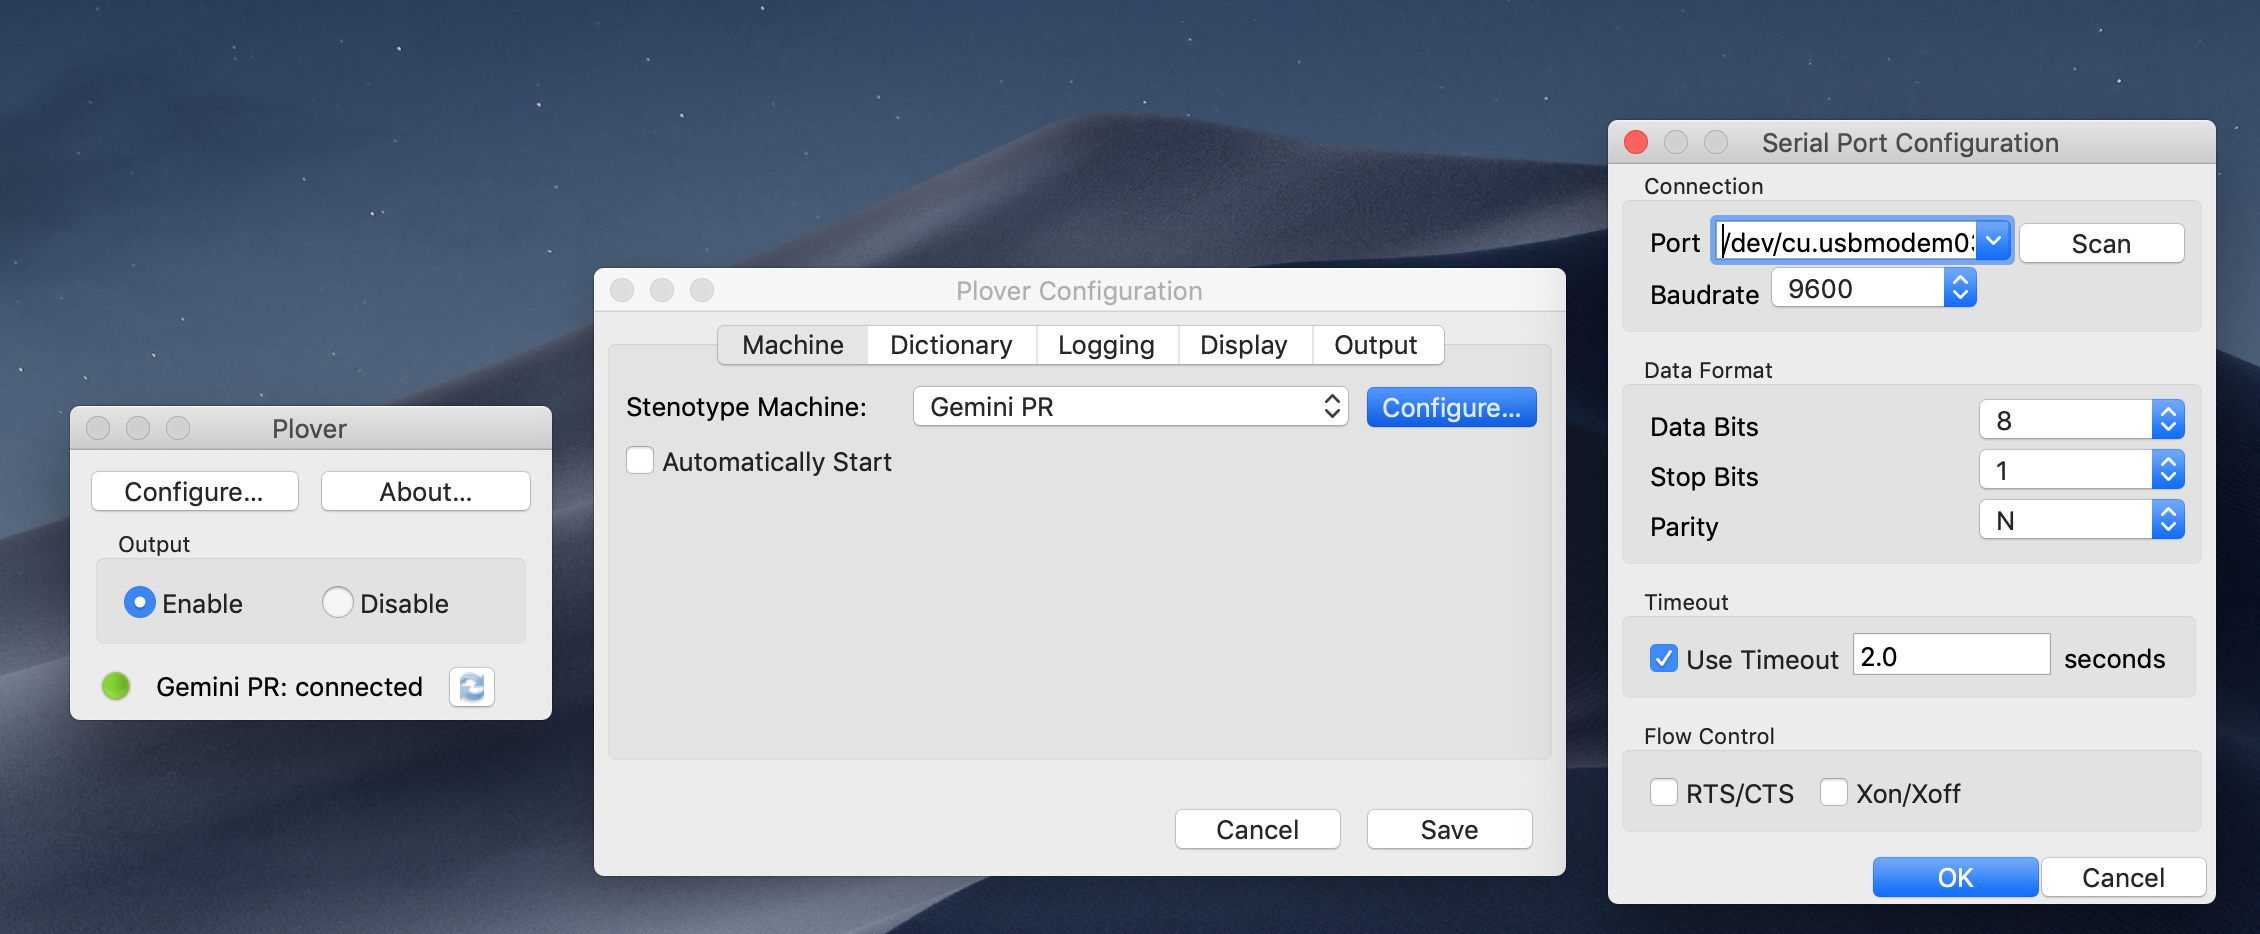
Now go ahead and plug everything in! Be gentle on the cabling for the first few inserts as it can be a little tight until it wears in. Plug it into your computer, fire up Plover, open your machine settings, and scan and select the correct serial port. That’s it!
Your board is now ready for use with Plover, but you might accidentally toggle a few modes that are inside of Georgi, so let’s go over them.
Remember! If you have issues, unplugging your board and plugging it in will reset to a clean state. If using a non rev2 or higher board, be gentle on the TRRS jacks!
Modes
Georgi has three operation modes: Steno, QWERTY and Command.
Lets start with Steno. If you’re using a Georgi you’re probably familiar with this already. If not, The Art Of Chording has you covered.. 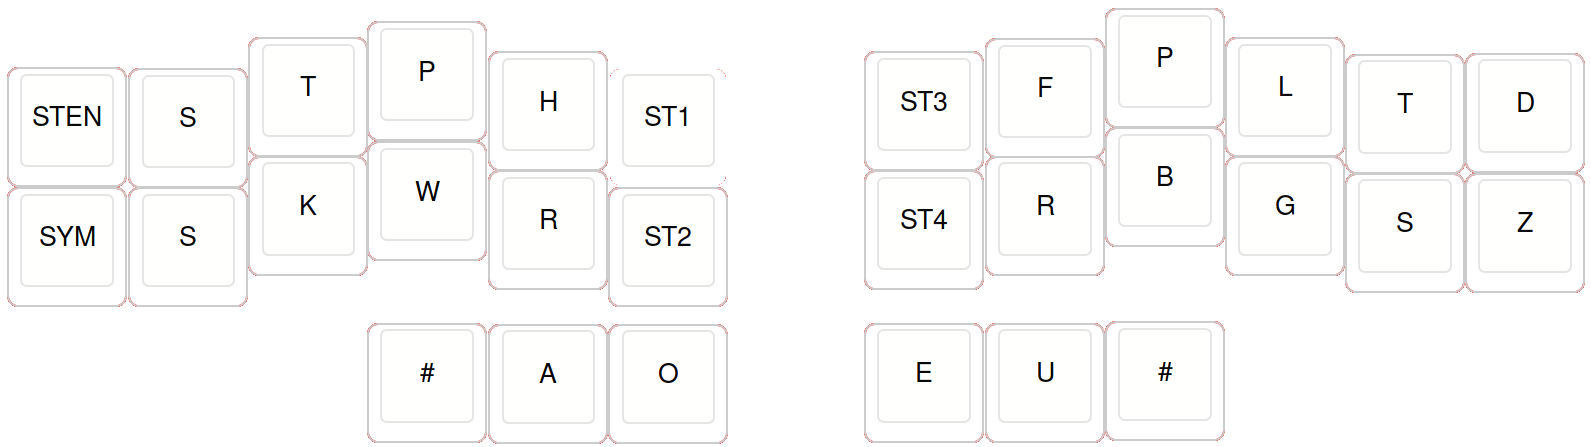
The QWER button toggles QWERTY mode, if you ever accidentally can’t type, you’d probably hit that. The SYMB button is a Momentary hold for symbols, you have to hold it while inserting them!
We’ll go on about that later but for now know that you can hold either of those in Steno mode for fingerspelling or inserting symbols!
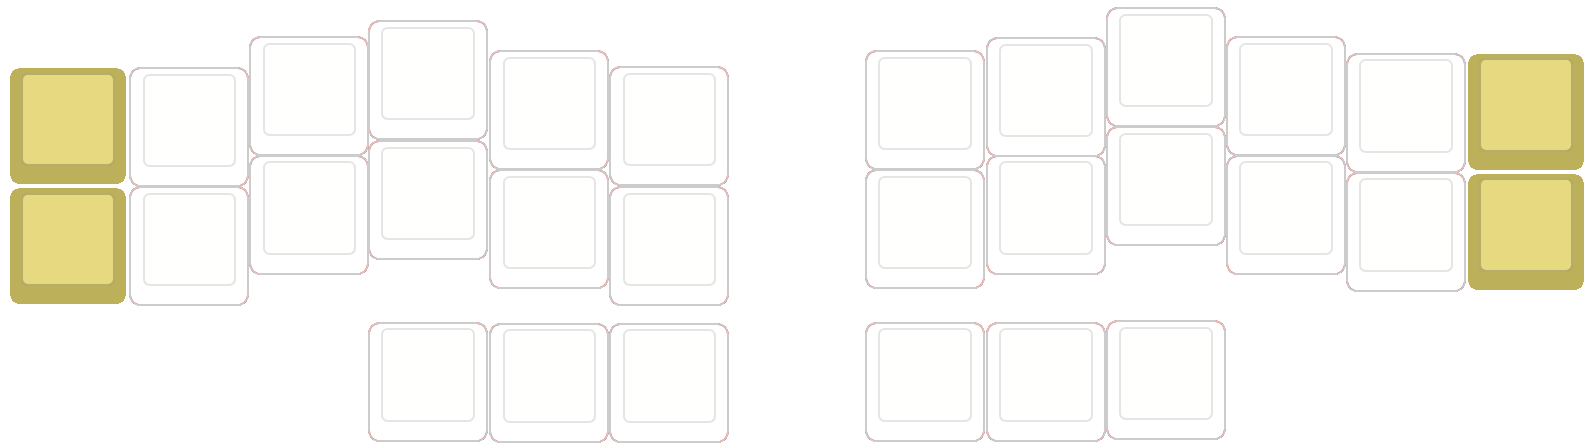
QWERTY mode is the main mode you’ll be in if you’re not using the Steno mode 24/7.
Here’s the keymap: 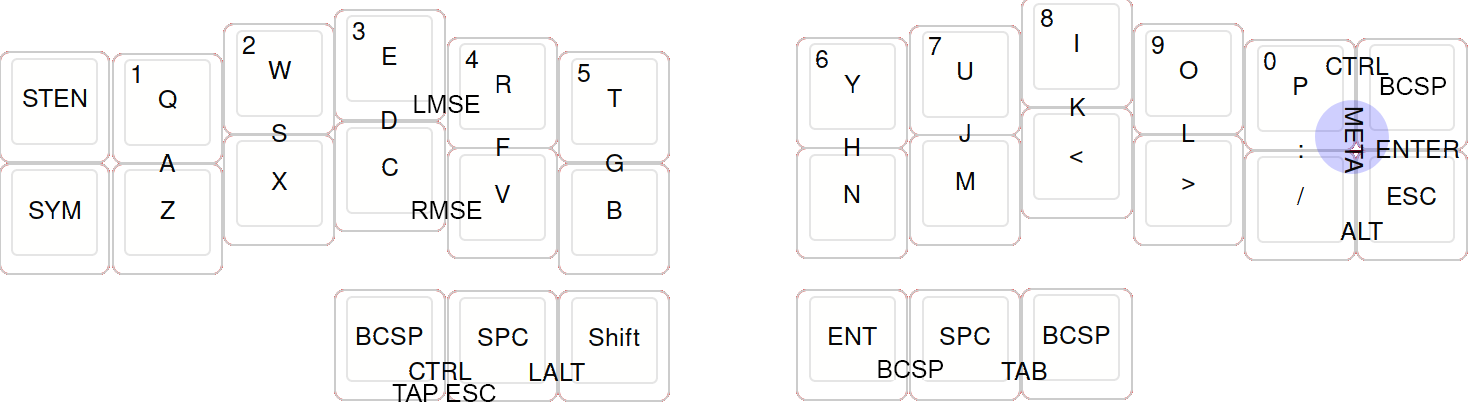 Pretty similar to a standard QWERTY layout eh? The markings along a crack denote pushing both of those keys in a chord, a blue dot is for the four centered around it. The main difference between this and a normal board is that a traditional keyboard sends keypresses as they’re depressed, this one sends the key only after the chord has been stroked!
It’s a little weird and may take a few days to get used to the timing difference; stick with it. The numbers can be accessed from QWER mode by simply holding NUM (where BCSP is located on QWERTY mode’s default layer).
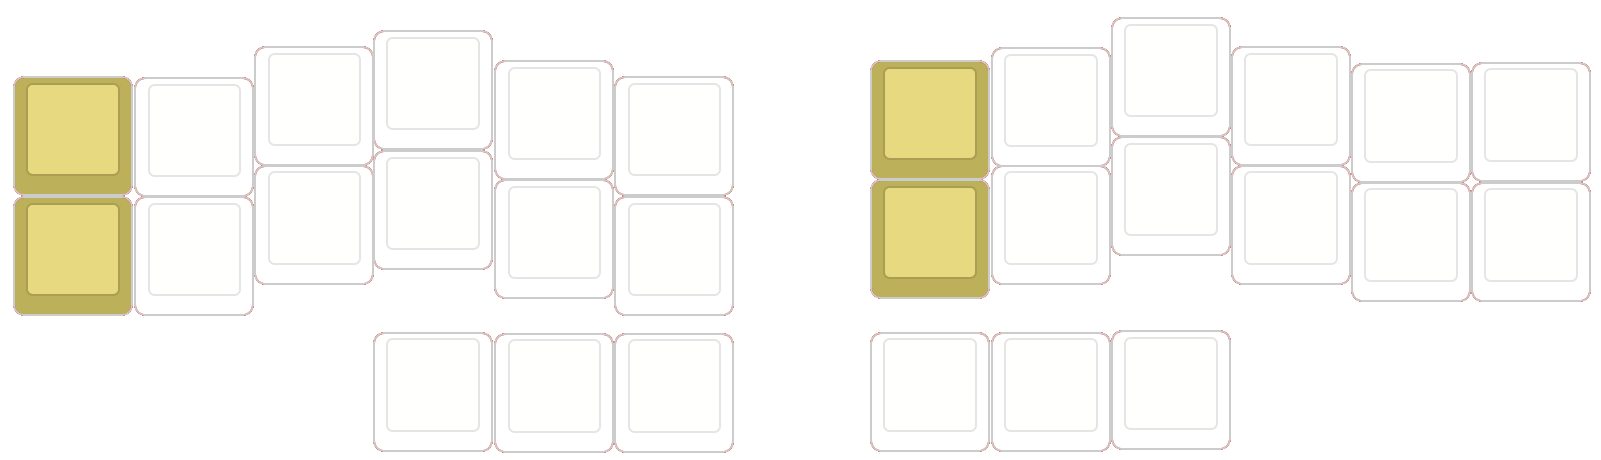
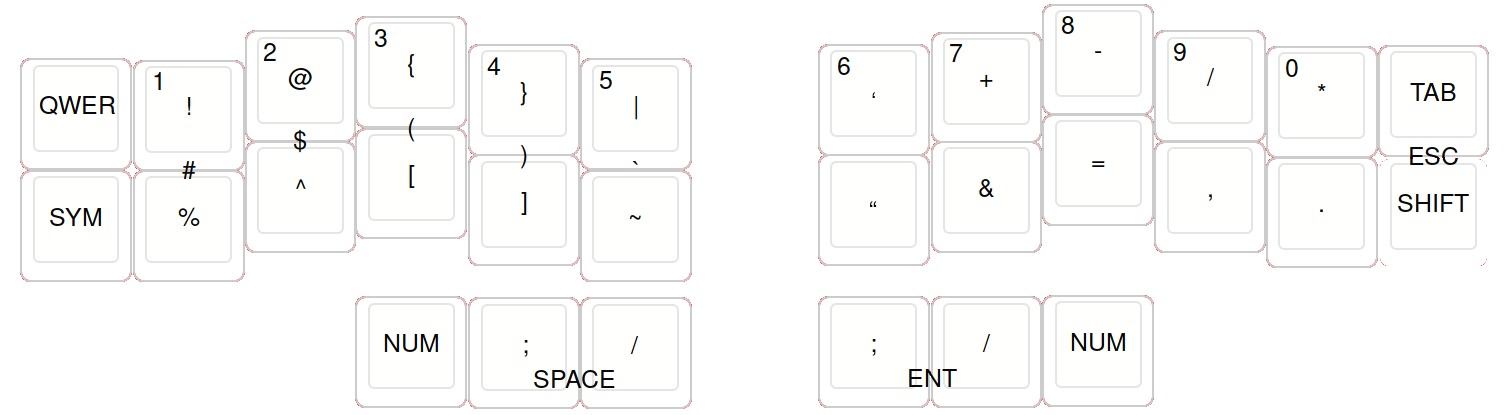 The symbols layer is accessed by holding down the SYM key; however, it cannot be switched to. Some of these keys can be shifted just like their QWERTY counterparts and to do that you hold the right shift key! The number layer is accessed by holding the number key while pressing the key. Usually it’s easier to insert numbers directly from the QWERTY layer!
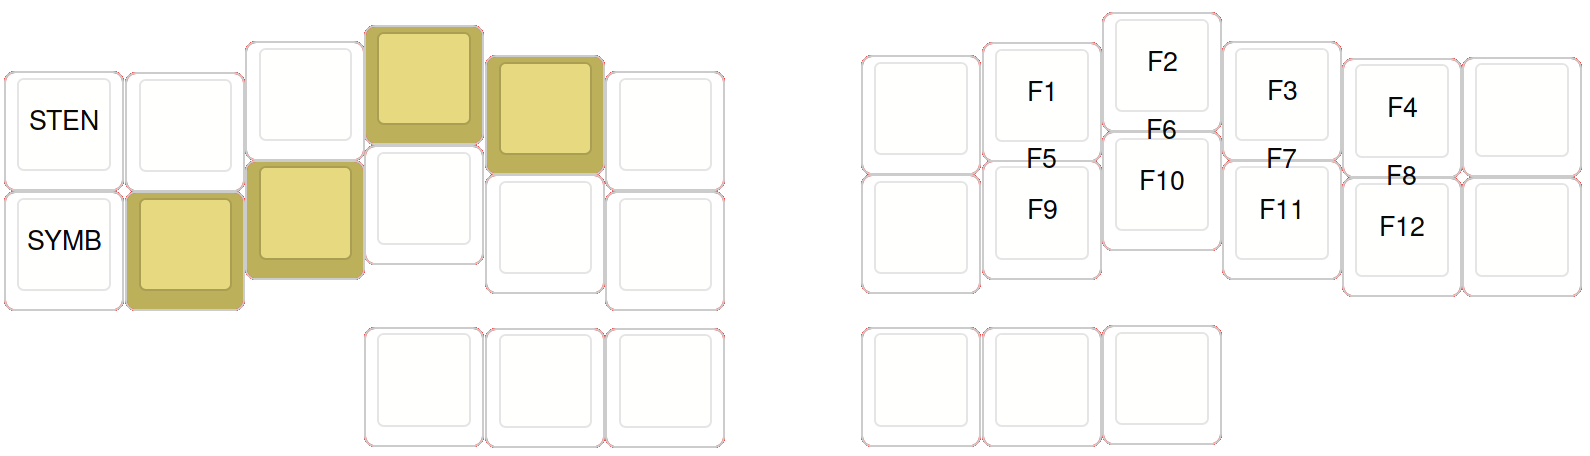
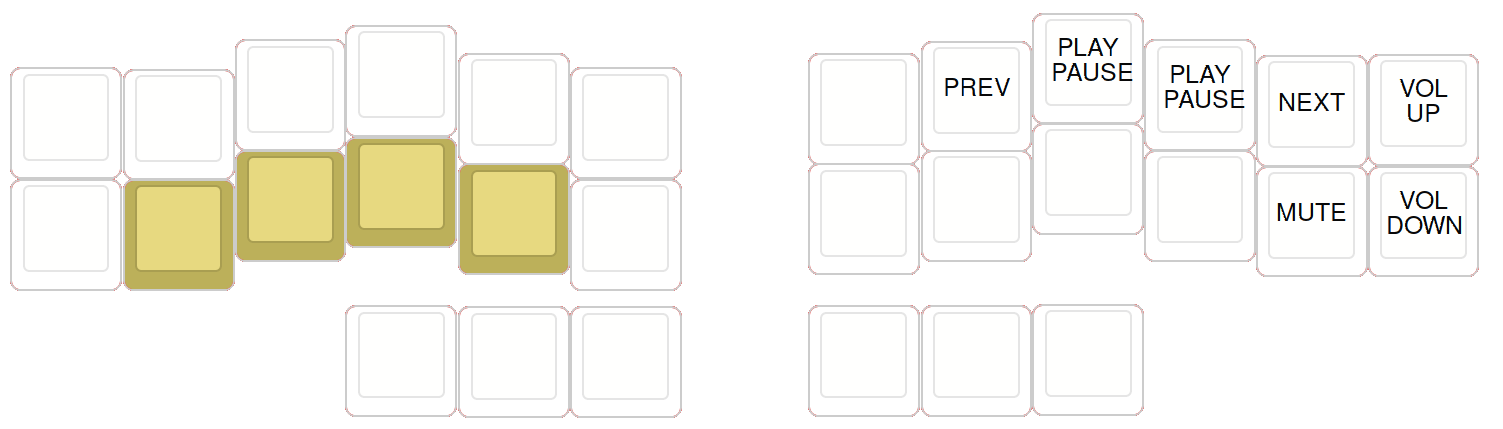
There are a few other ‘layers’ as well, the coloured keys are the prefix for the chord! There are some chords tucked away on the thumbs as well on the bottom :) 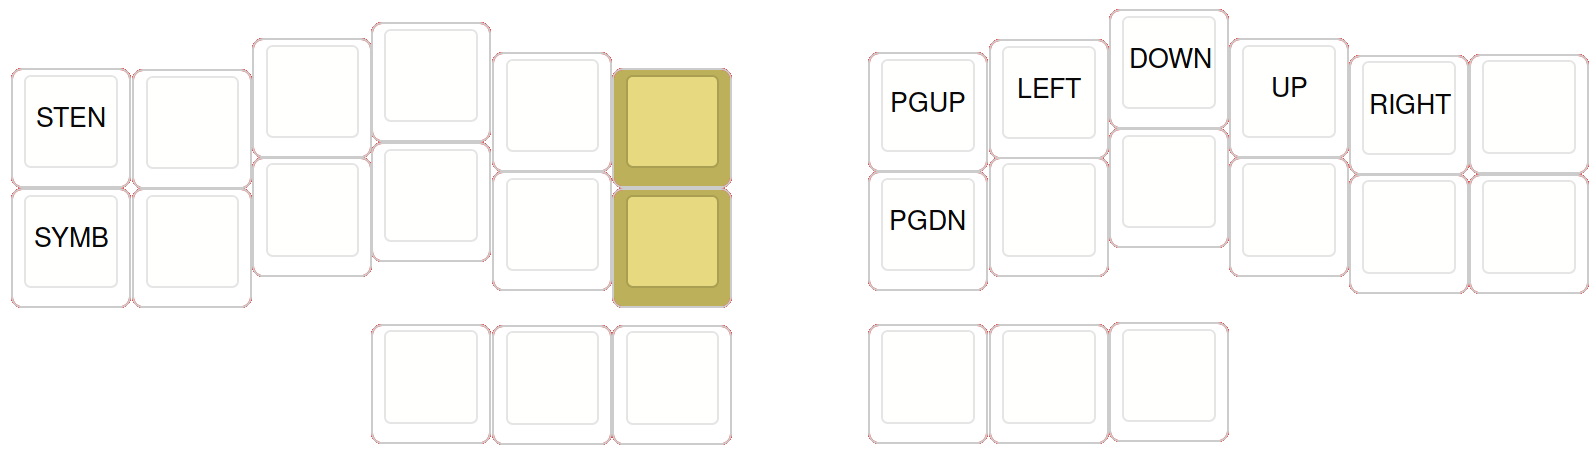
Fallbacks
Georgi uses GeminiPR for serial communication, this is what allows you to quickly toggle back and forth between Plover and QWERTY input. However this isn’t always an option (work machine, limited environment, etc). So for these kind of situations, the Steno layout can be used as a simple NKRO keyboard for Plover. If you need this, remember to have a stroke for enabling/disabling Plover in your dictionaries! Otherwise when you switch to QWERTY mode, Plover will still be active!
Command mode
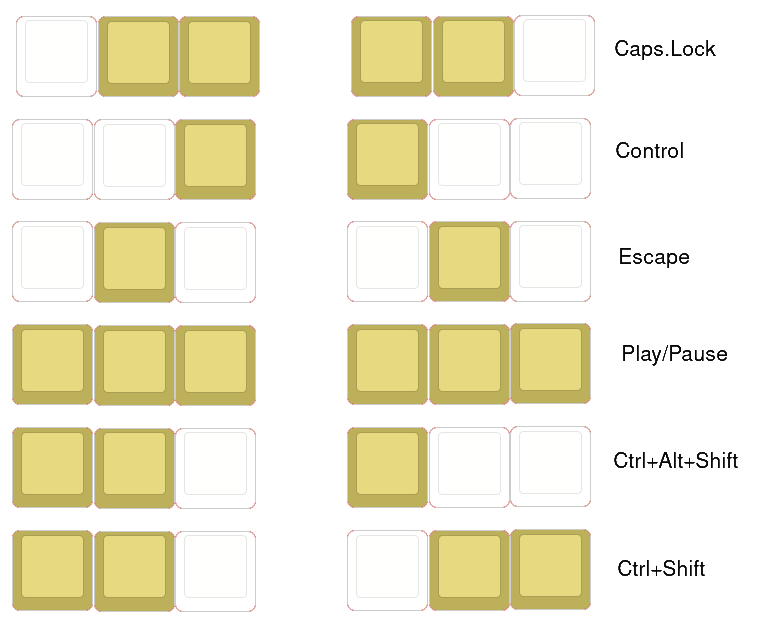
Due to the size of the board, key combos can be a pain if there is a conflict. What do you do when the key you’re trying to chord overlaps with another that you need? Enter Command mode. Command mode buffers all of the keys that are pressed while it’s active; once you exit command mode the keys are all pressed down, and then released in one go. So inserting say ‘Ctrl+Shift+S’ could be done in the following way ‘Command mode/Ctrl/Shift/S/Command mode’.
Note: There are a good number of alternative binds for modifiers and you can always add definitions to your firmware! If you find a bind that you’re using frequently, don’t just whack it in over and over again in command mode, add it to your keyboard, find an alternate way to stroke it or use Plover to bridge the gap!
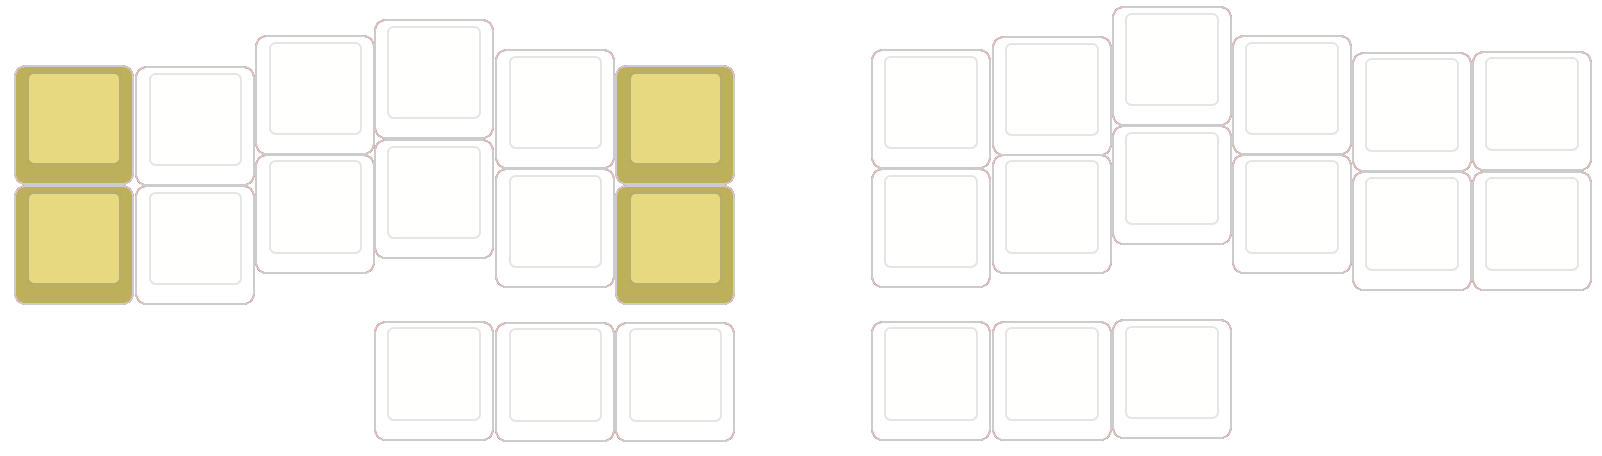
Entering QMK (Gaming mode)
Pressing this chord will move to the next available QMK layer (or do nothing if you only have the Steno layer). This layer acts like a traditional keyboard as opposed to stenotype. On this layer are your traditional WASD and a momentary layer for numbers/lower QWERTY.
To access the momentary layer while in Gaming mode, hold LAlt (where the LShift key is on the default layer for QWERTY mode).
To return to Steno, press the right number key.
Configuration with Plover
Unless in fallback mode, Georgi uses GeminiPR to communicate with Plover. Because of this you do not have to disable Plover to use Georgi as a keyboard. To set it up go into Configure > Machine Settings > GeminiPR and Scan for the device. Select the correct serial port from the dropdown.
In addition, you may need to install the QMK driver pack if using a Windows OS; you will be prompted for installation of the drivers by the QMK Toolbox.
If QMK Toolbox doesn’t prompt to install drivers, try this out.
Protips
- Do yourself a favour and print off the keyboard map and leave it by your desk. This little guy is a radical departure from usual keyboards and with any new map, it’s going to take some getting used to. Looking stuff up is to be expected for the first bit and getting used to the keyboard itself is going to take a while even for existing stenographers!
- You can do temporary Plover from QWERTY if you hold the STEN button in your chord. Use this for sending shortcuts to Plover for binds and other stuff.
- Similarly you can do temporary QWERTY fingerspells from Steno! Hold the STEN button while you’re typing.